
spark
my tinkerer journey into the fantastic 3D printing world, cnc, rc cars and such…
Voron 0.1: My initial startup
I recently purchased a LDO Kit for a brand new Voron 0.1 and completed the build. Since I have no idea what I’m doing here and it is a pretty custom printer, I decided to document the initial steps. Here are the basic steps I made to tune my Voron 0.1 for the first time. It is based on the official guide.
Looks pretty good, both the nozzle and bed are around 19-20 degrees. The printer is located in my workshop and it match the thermometer.
Set the nozzle to 50 degrees (M104 S50) and the bed to 60 degrees (M140 S60). They should both reached it pretty quickly but the temperature might vary. Make sure the silicon cover is correctly in place. If it vary, like in my case, don’t worry we’ll calibrate it shortly.
Buzzing
Test if steppers are working properly. The STEPPER_BUZZ command will move the motor 1mm and come back to its origin a few time. Make sure the proper steppers are moving by running:
[ADDED] Before making a complete homing (step 5) which could damage the printer, I forced stepper movement using these commands. Making them buzz is something, but actually making them move is another one. We have to make sure they go in the right direction.
Run QUERY_ENDSTOPS, it should return x:open y:open z:open. Manually trigger the 3 endstops one at the time.
[ADDEDD] BEFORE, turn off the printer and move the toolhead manually to see if the endstop triggers are reached. Otherwise the toolhead will ram and might cause issue.
For this test, the documentation mentions that you should be able to turn off the printer is something goes wrong. Make sure you have tested your options.
This one didn’t go in the right direction so I changed
dir_pinto!PB2. The endstop also wasn’t triggered automatically. I’ve added a square nut and a small M3x6 to allow the gantry to trigger it. Not sure if it was in the manual and missed it but it did the job though.<Insert photo>
The screw doesn’t seem to be aligned properly, I’m pretty sure the endstop won’t be triggered automatically. I’ll make sure to have my power switch ready in case. I had to glue a small extension I made from the T-Nut adapter that I didn’t use. We’ll see how it holds with usage. The bed is close enough when it reach the endstop and drop afterward. But, motors are working properly now. Let’s continue.
<Insert photo>
So, it seems my motors are not correctly connected. My Y and X are all messed up like the scenario in the red circle. Gonna have to swap them.
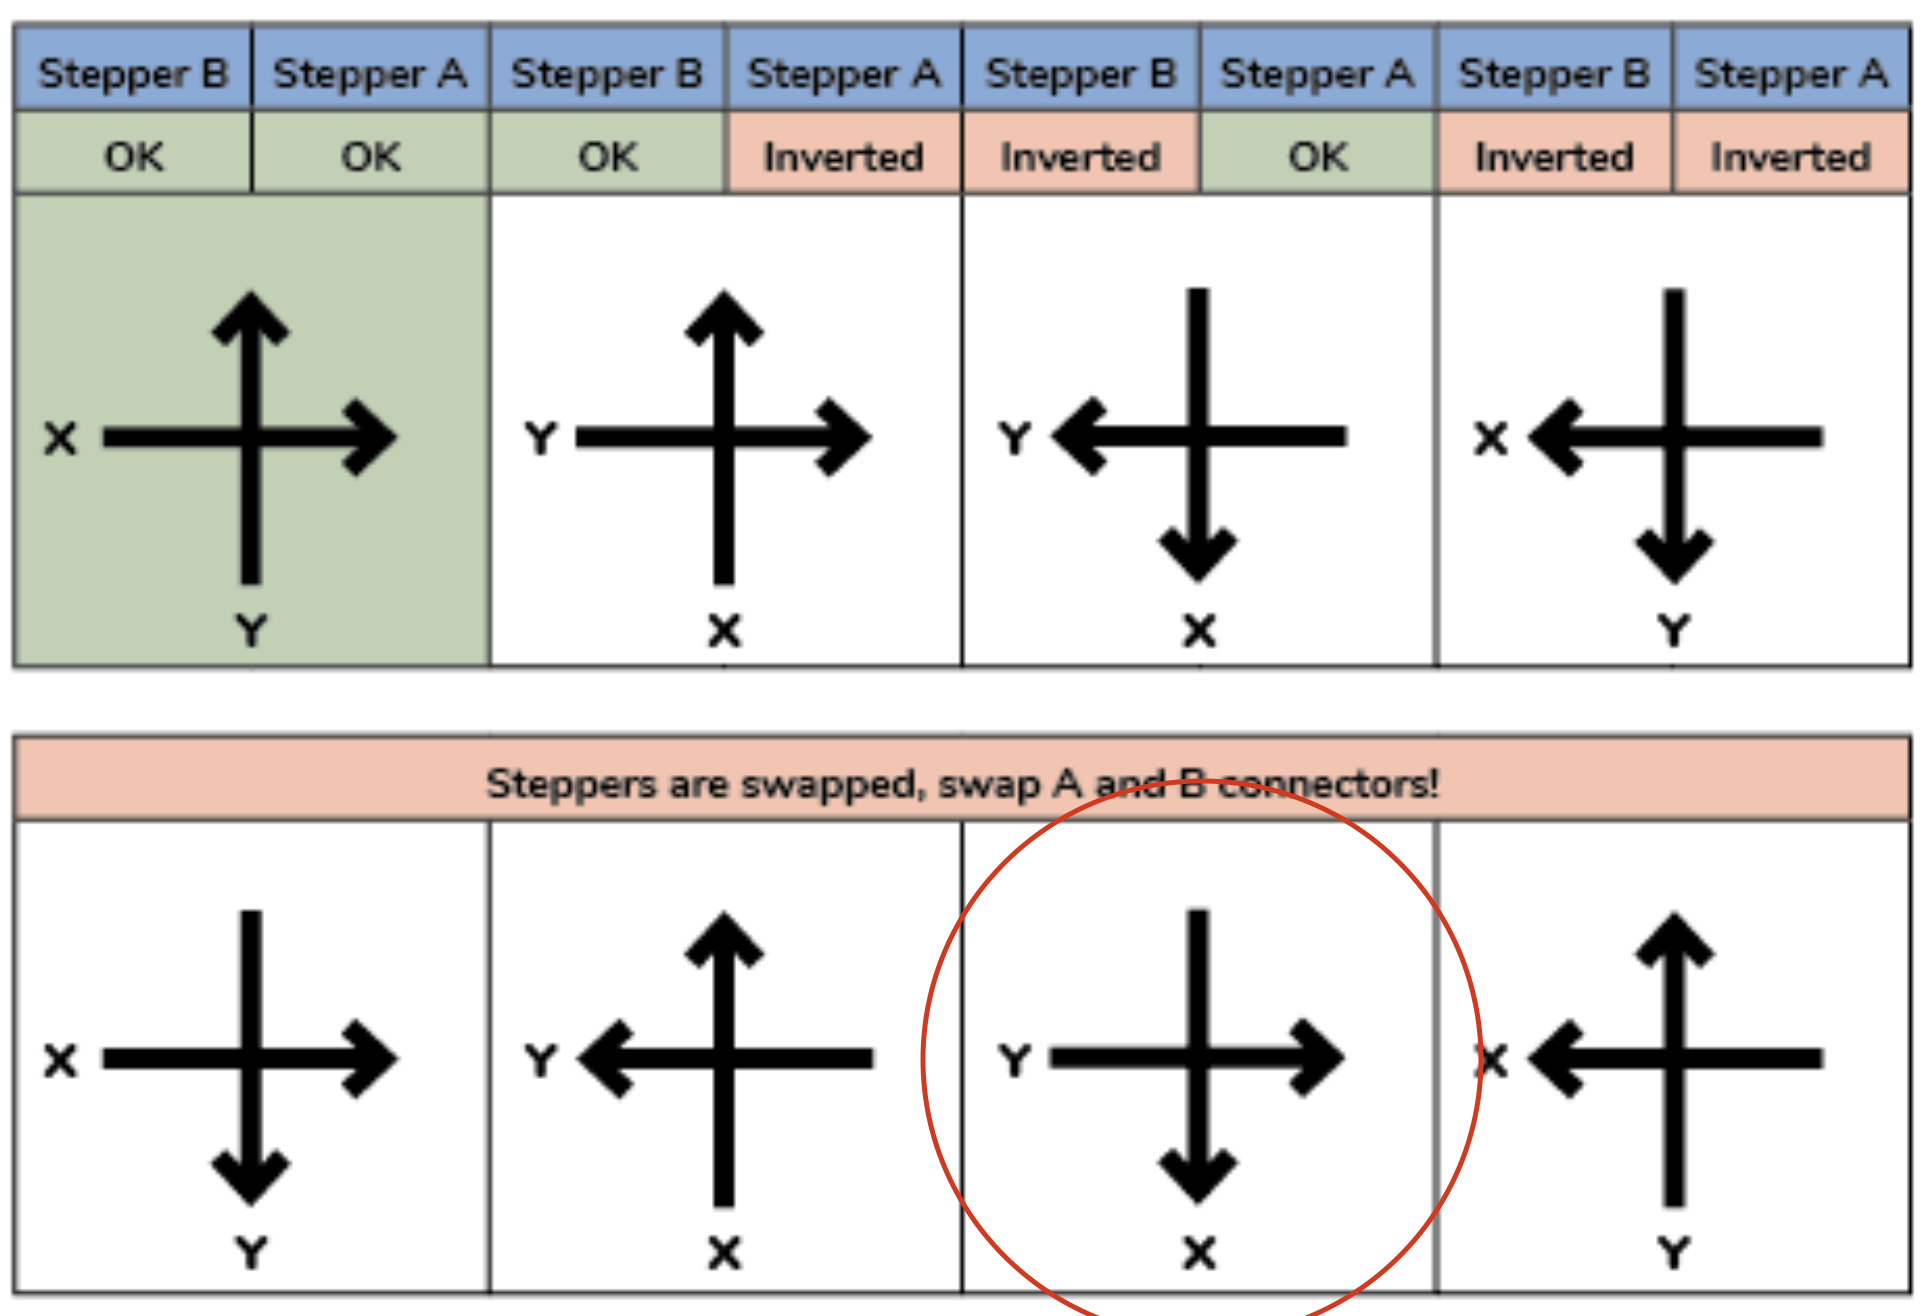
Once done, I’m in the second scenario (at the top). I’ll now change back the dir_pin to PB2 on stepper Y that I changed earlier and I shouldn’t have. Everything is now homing perfectly! 🎉
✌️