
spark
my tinkerer journey into the fantastic 3D printing world, cnc, rc cars and such…
Voron 0.1: Swapping Mini Afterburner with Mini AfterSherpa
I’ve been trying to print TPU for a while now and it did not work on my Ender 3 v2 with a bowden setup since the filament is too elastic (which is the end goal). Also, it jammed in the extruder’s gears of the Mini Afterburner on my Voron 0.1.
It appears that there are mixed opinions about the Mini Afterburner toolhead in the community. Some users have reported issues or limitations with its performance, while others have had success with it. I thought it would be worthwhile to consider other options like the Mini AfterSherpa that have swapable extruders. At least, I would have a few options to test out.
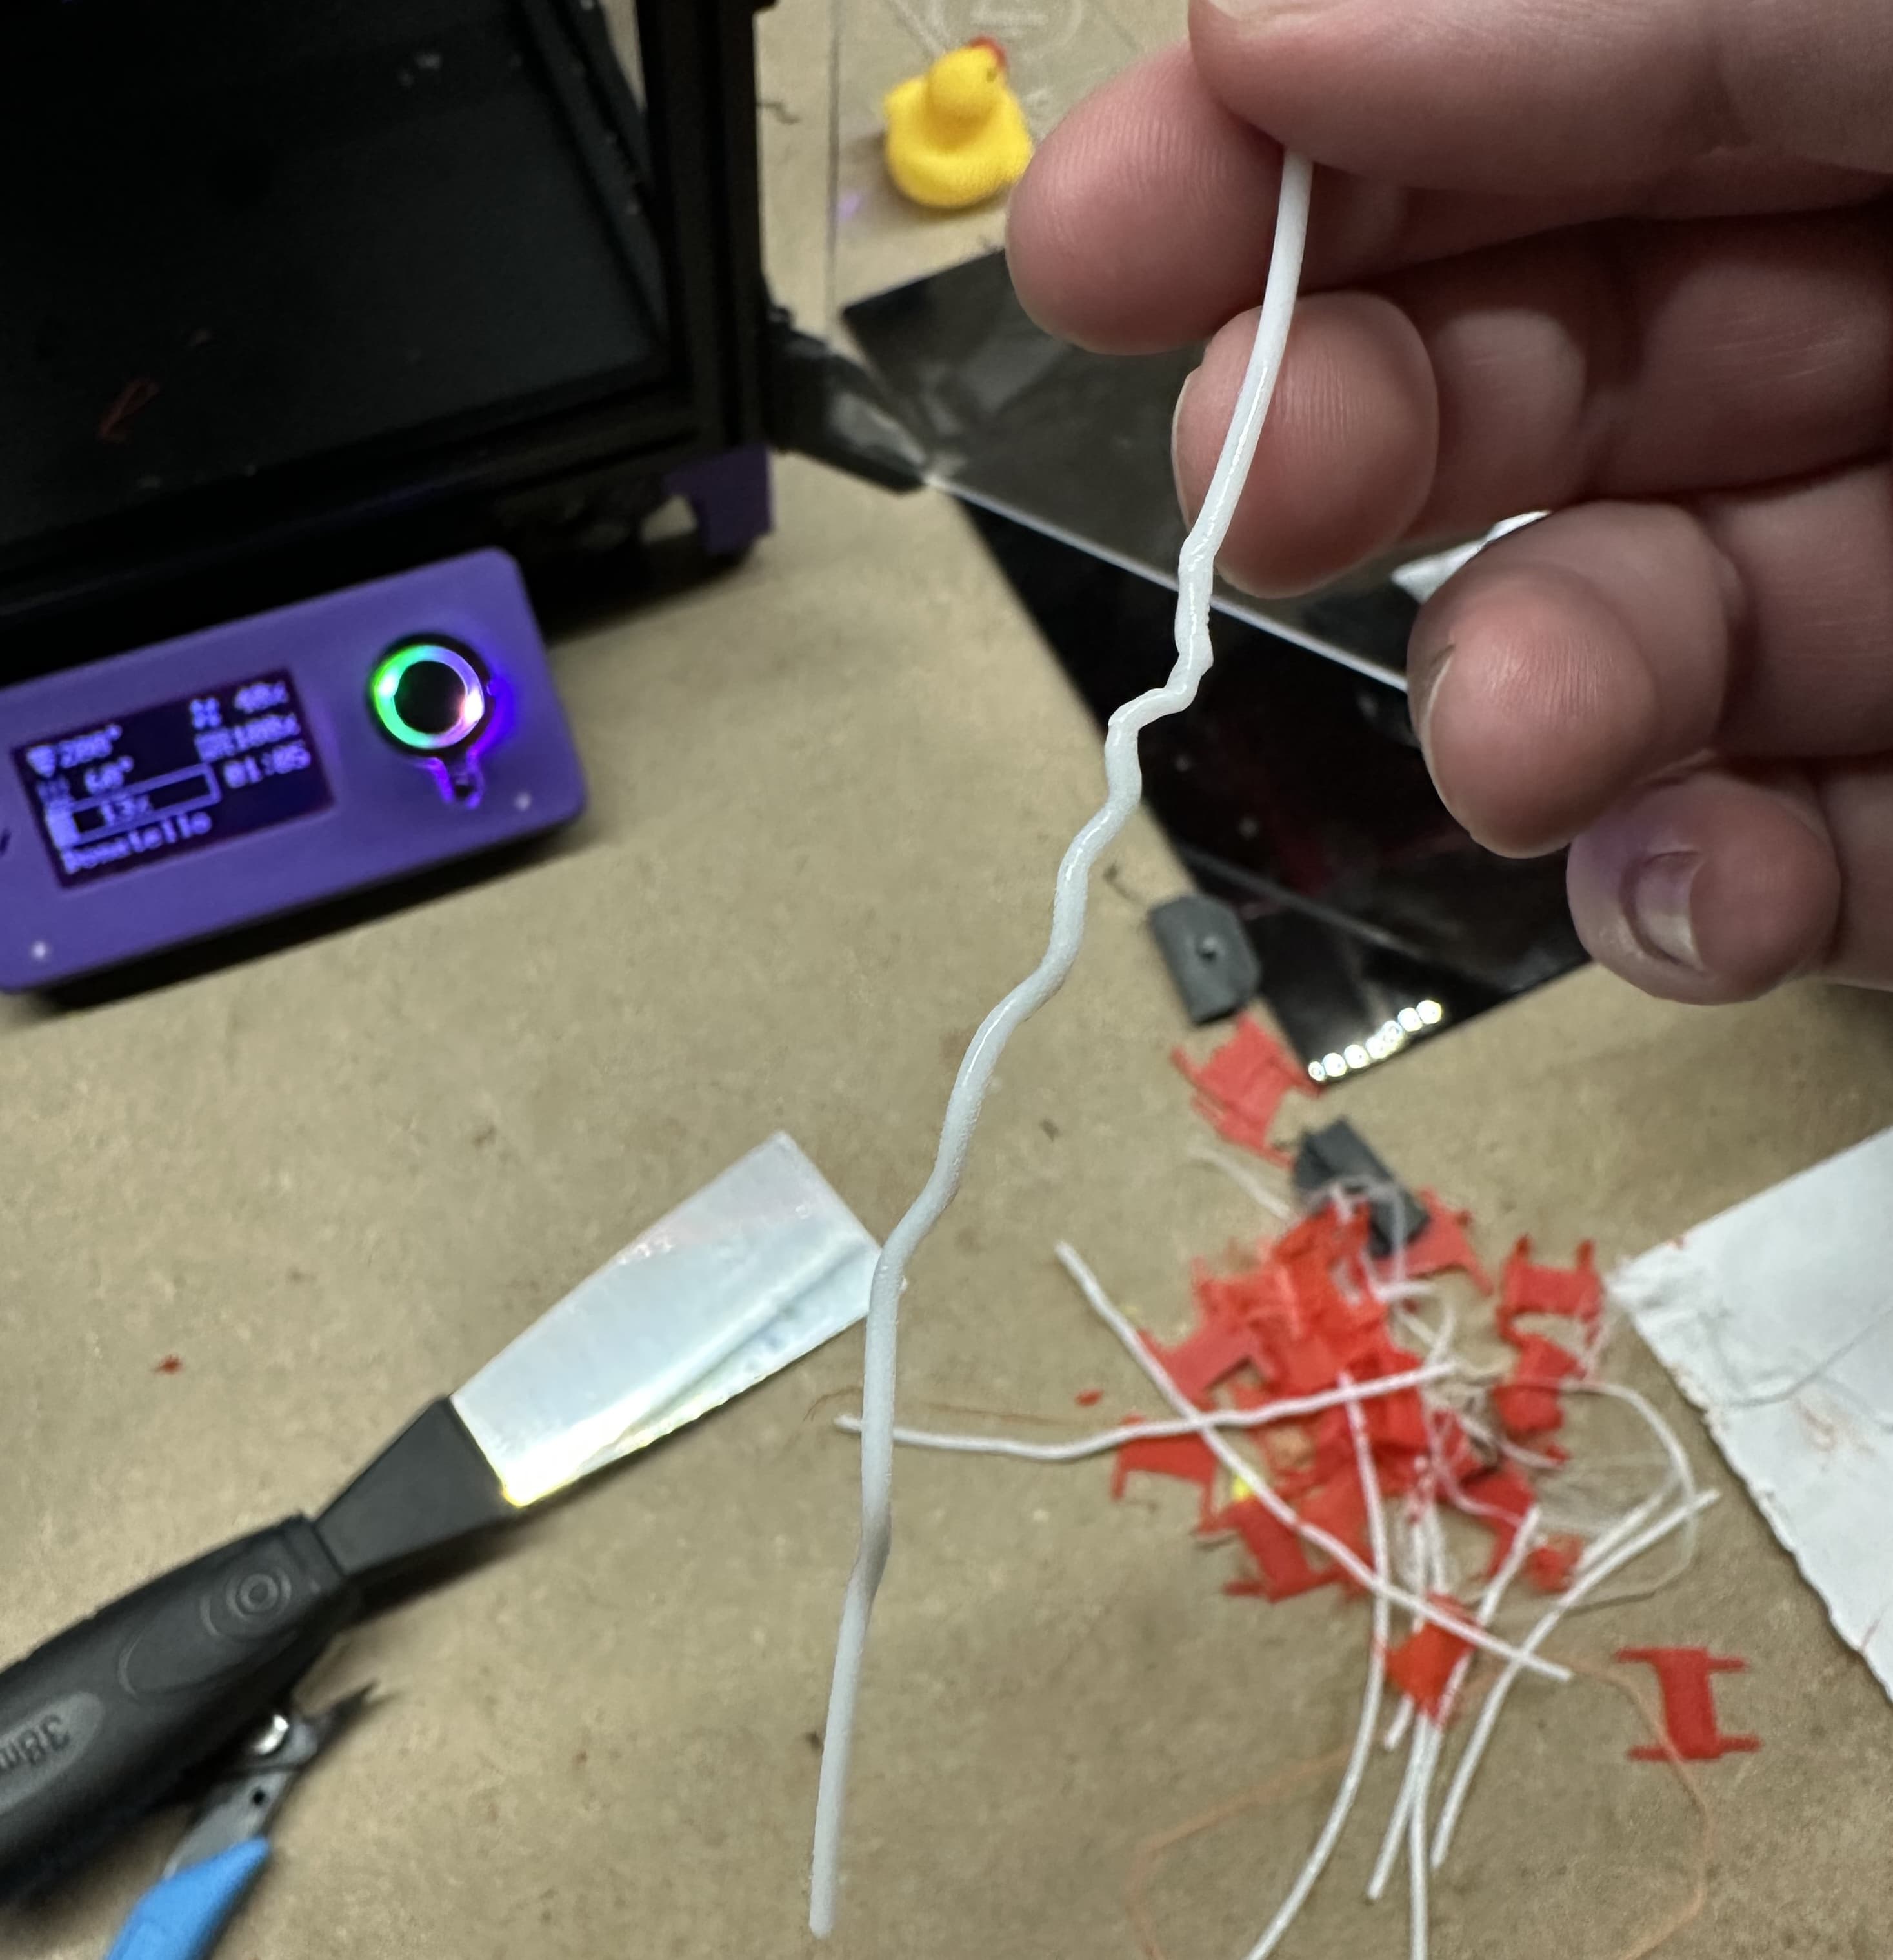
TPU filament after it jammed into the Mini Afterburner extruder.
BOM
Mini AfterSherpa
- [2x] 3010 blower fans*
- [1x] 3007 axial fan*
- [2x] M2.5x8 BHCS/SHCS*
- [3x] M3x35 BHCS/SHCS*
- [2x] M3x5x4 heat inserts
Sailfin extruder
- [1x] LDO 17mm Nema14 Stepper with gear*
- [1x] Bondtech BMG*
- [1x] M3x25 BHCS
- [2x] M3x14 BHCS
- [1x] M3x10 BHCS
- [2x] M3x5x3 heat inserts
- [1x] Short BTFE tube*
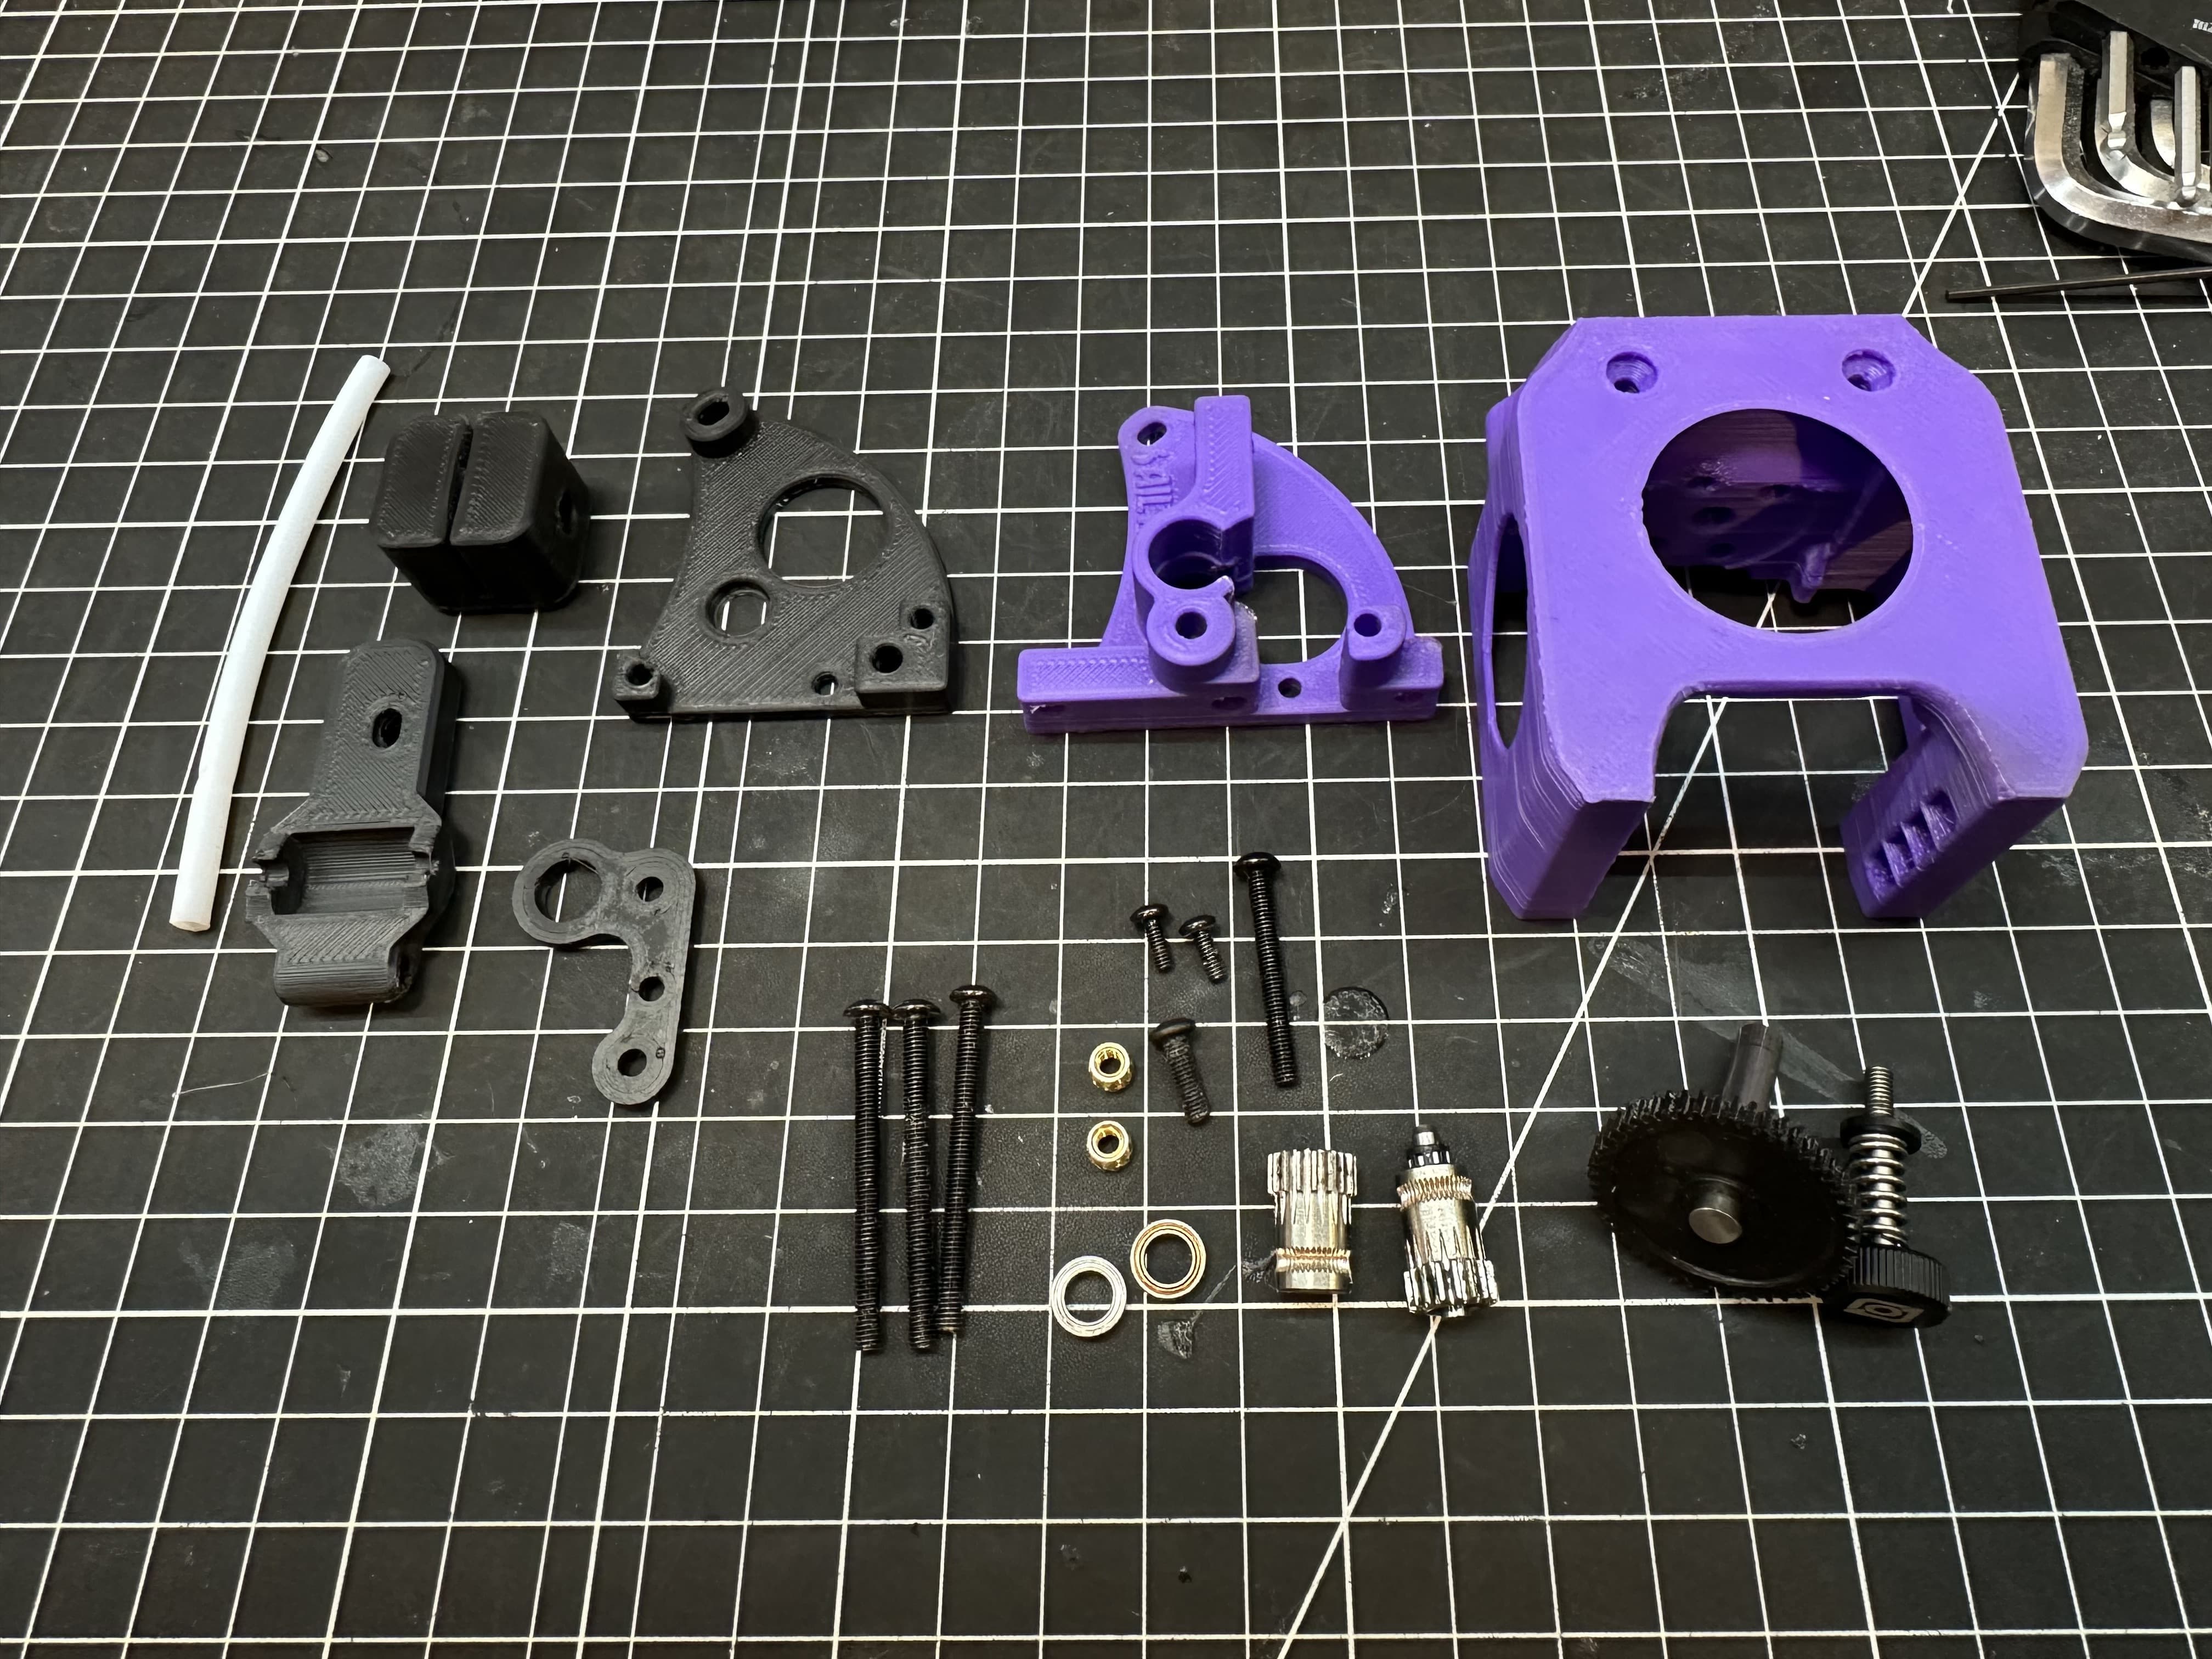
The BOM in picture with the printed parts. Everything needed to build the Mini AfterSherpa with the Sailfin direct extruder.
Build
Heatset inserts
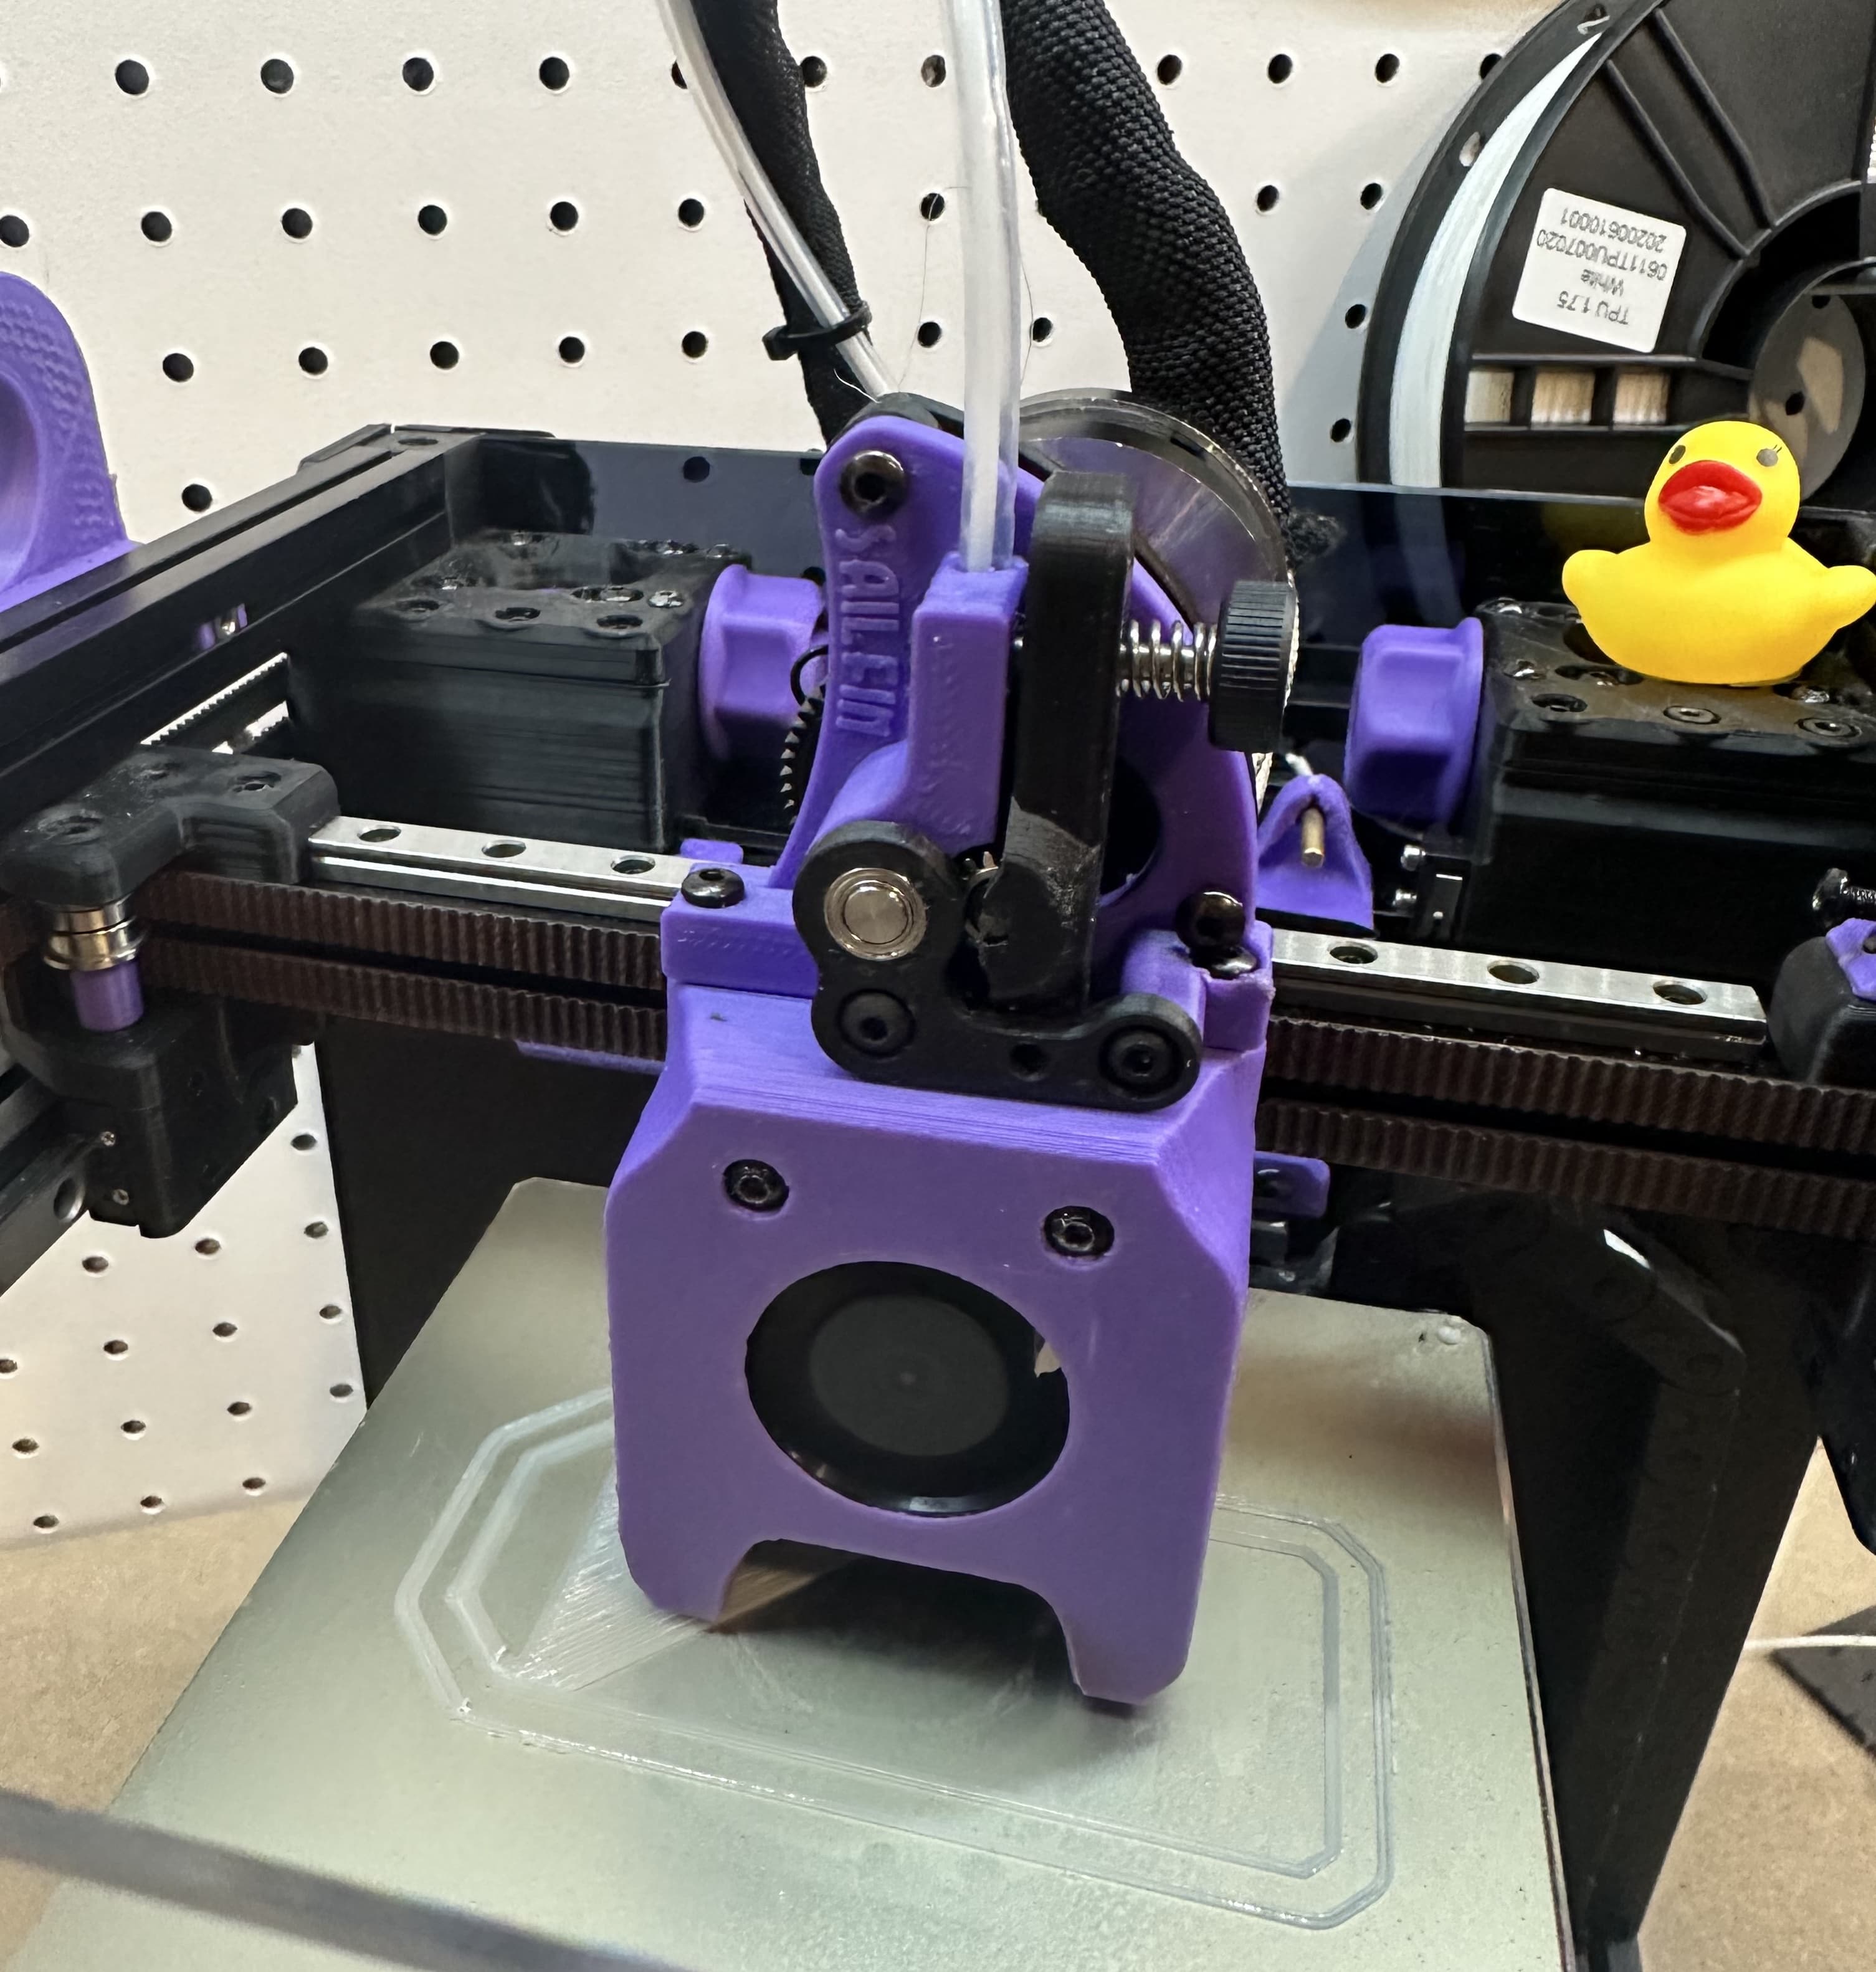
Mini AfterSherpa
The Mini AfterSherpa is pretty straightforward to assemble. It is working as the Mini Afterburner. I have nothing much to document here. In my case, I’m using a Phaetus Dragonfly Hotend hotend.
Mounting the Sailfin
TBD
Result
The main objective of this new toolhead was to be able to print TPU. Was it a success? Check this beauty:
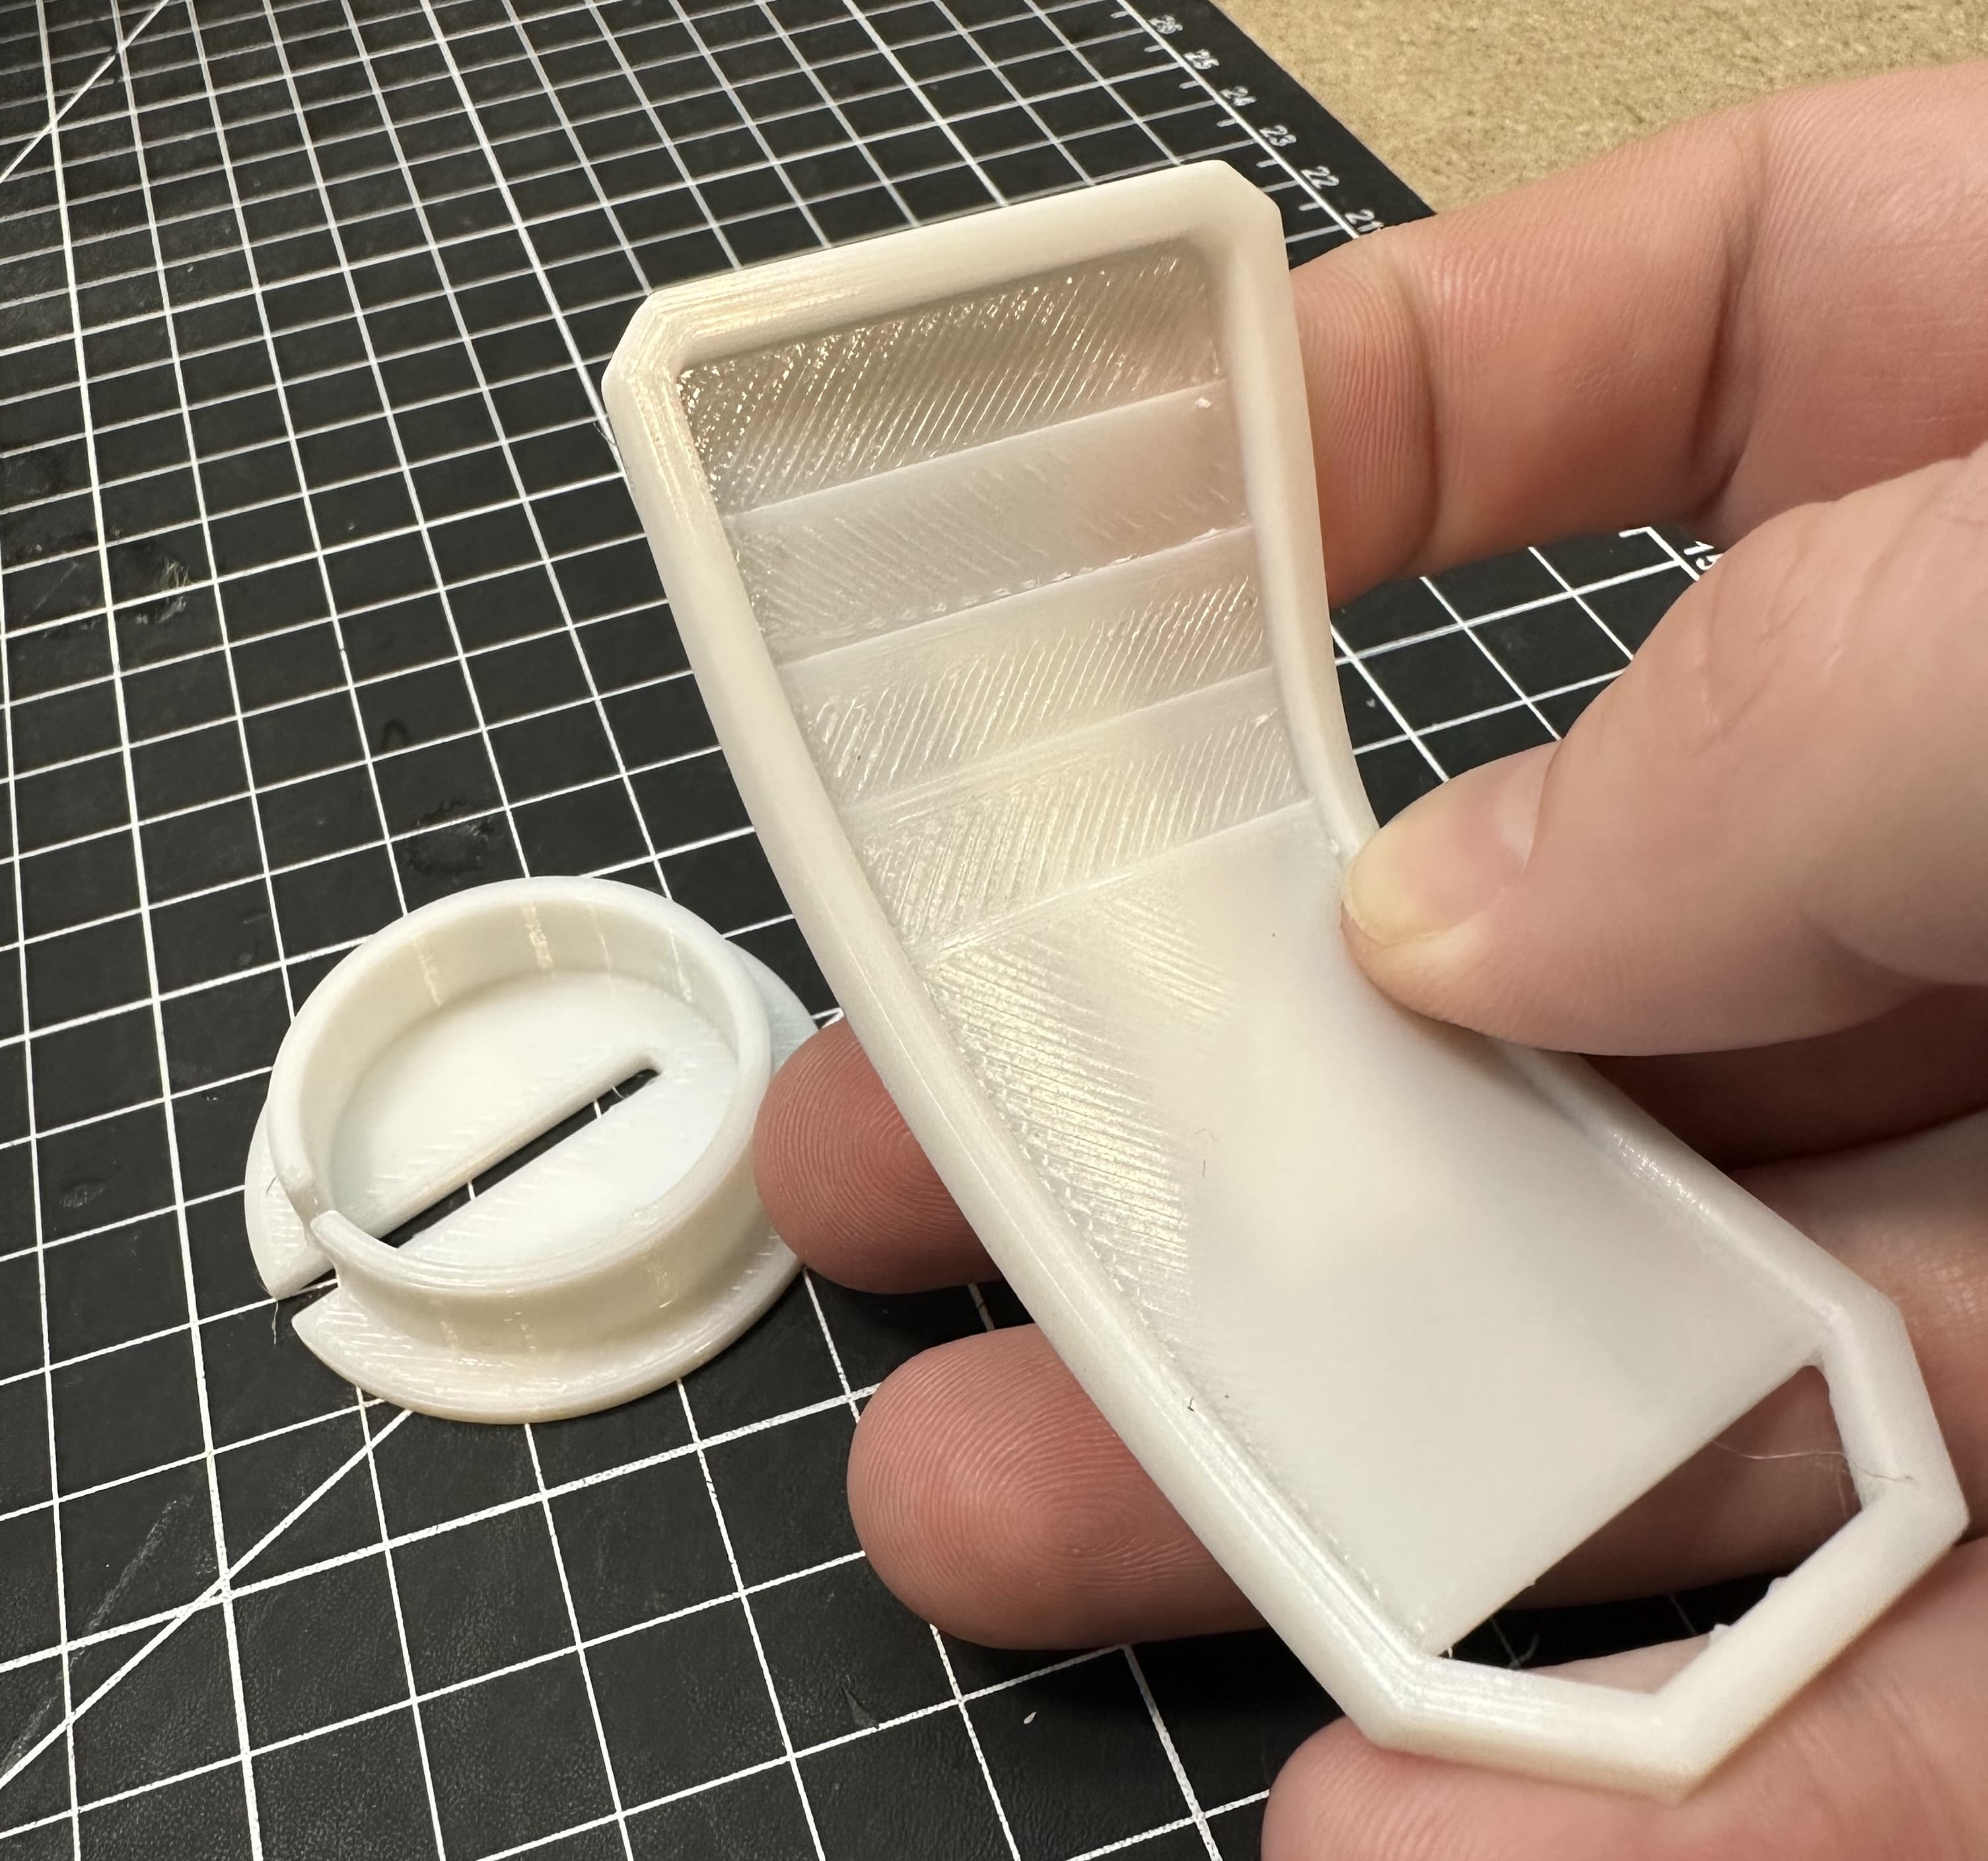
Beautifully printed TPU parts using the new Mini AfterSherpa + Sailfin extruder combo 😍
✌️